How to make four-at-a-time flying geese
A step by step tutorial
To help you make the Airspace Quilt.
The Airspace Quilt pattern is made with flying geese. Lots of flying geese. In fact, almost entirely from flying geese! The great news is that we can make them using a clever method that saves time and wastes very little fabric, compared to other techniques.
Flying geese are one of the traditional building blocks of quilt designs There are different ways to make flying geese for patchwork quilts. For the Airspace Quilt we use the ‘four-at-a-time’ method. It’s just about the quickest way to make flying geese and my version of this method makes them slightly over-sized so that they can be trimmed. Trimming helps you to create really accurate blocks with crisp tips, every time! This means that the Airspace Quilt is ideal for any quilter who already loves to make flying geese or wants to improve their technique using the four-at-a-time method.
This tutorial will guide you through each step of the process! Click through each set of slides below for detailed, step-by-step photographs and instructions to use alongside the Airspace Quilt pattern.
Kathleen x
Steps 1 - 4
Have your copy of the Airspace Quilt pattern ready to make sure you have the correct fabric squares.

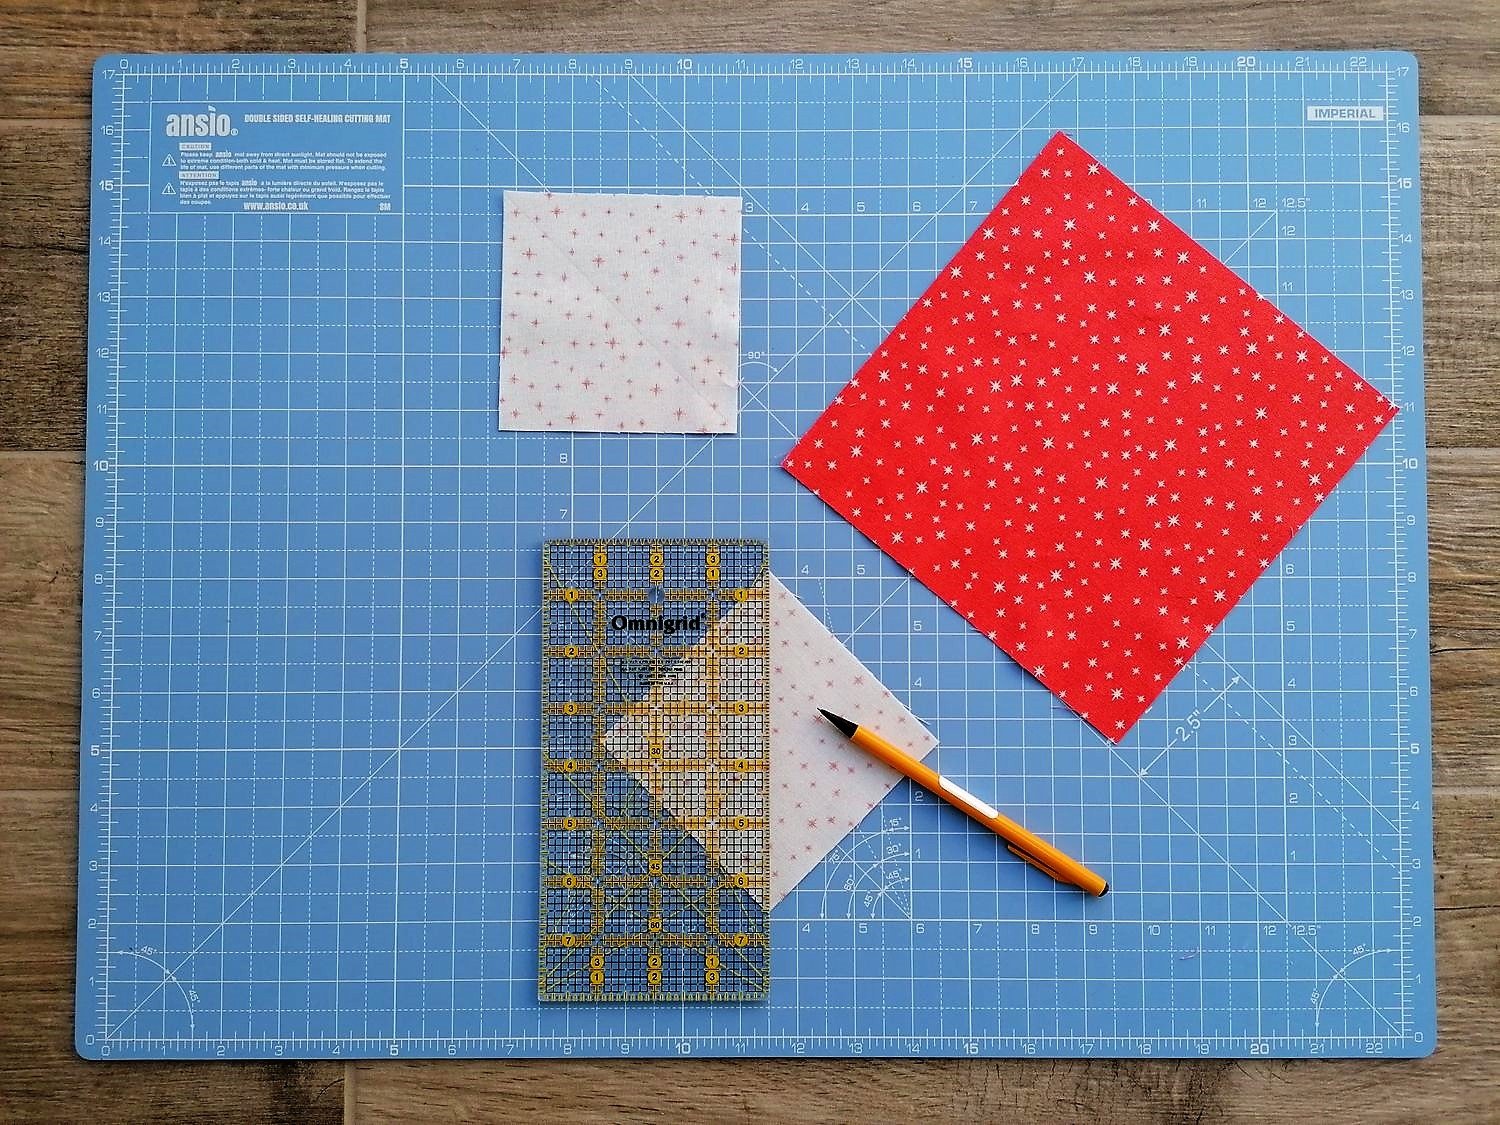

1 To make four-at-a-time flying geese you will need:
A cutting mat, rotary cutter and quilting ruler(s)
Pins
A marking tool (such as a fabric pen or pencil, tailors chalk or Hera marker - I like to use a Papermate pencil)
Fabric squares, one large and four small, cut out to the dimensions set out in the Airspace Quilt pattern.
2 Mark a diagonal line on the wrong side of the small squares.
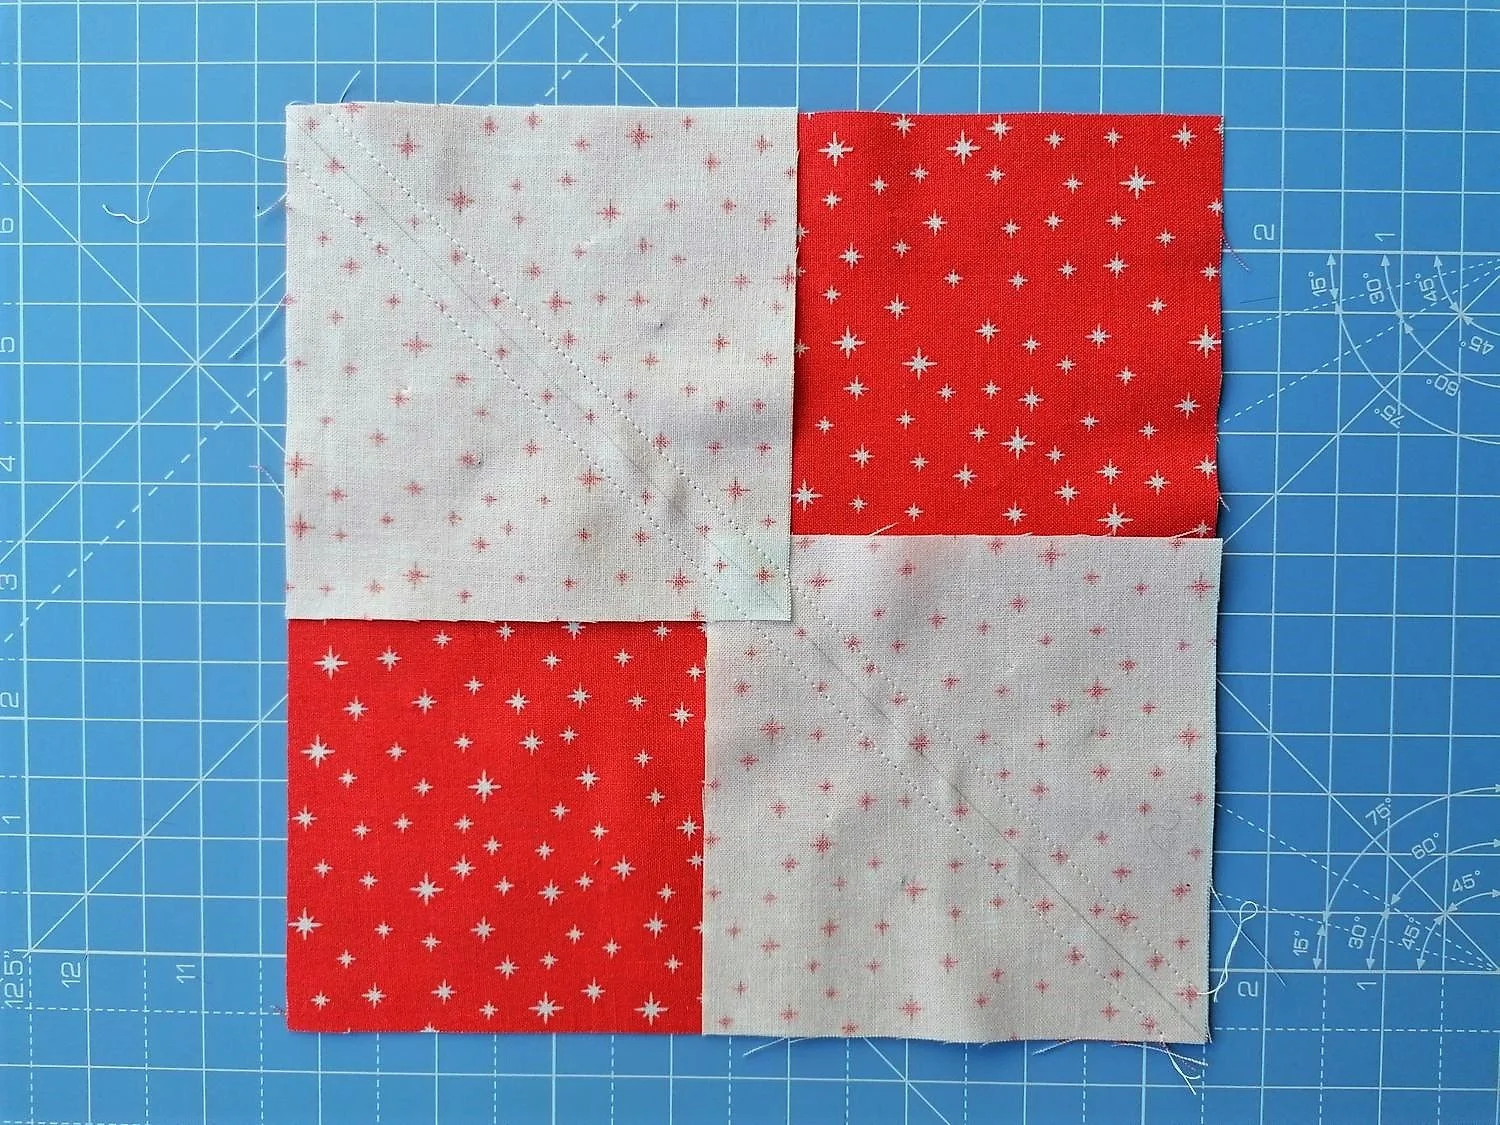
3 Pin two small squares to the large square, right sides facing, in opposite corners. The marked lines will form one long diagonal across the large square and there will a small area of overlap between the two small squares.
4 Sew on both sides of the marked line, ¼” away from the line.
Steps 5 - 7
Before cutting, always double-check your measurements and/or the position of your ruler and cutting mat to avoid errors.


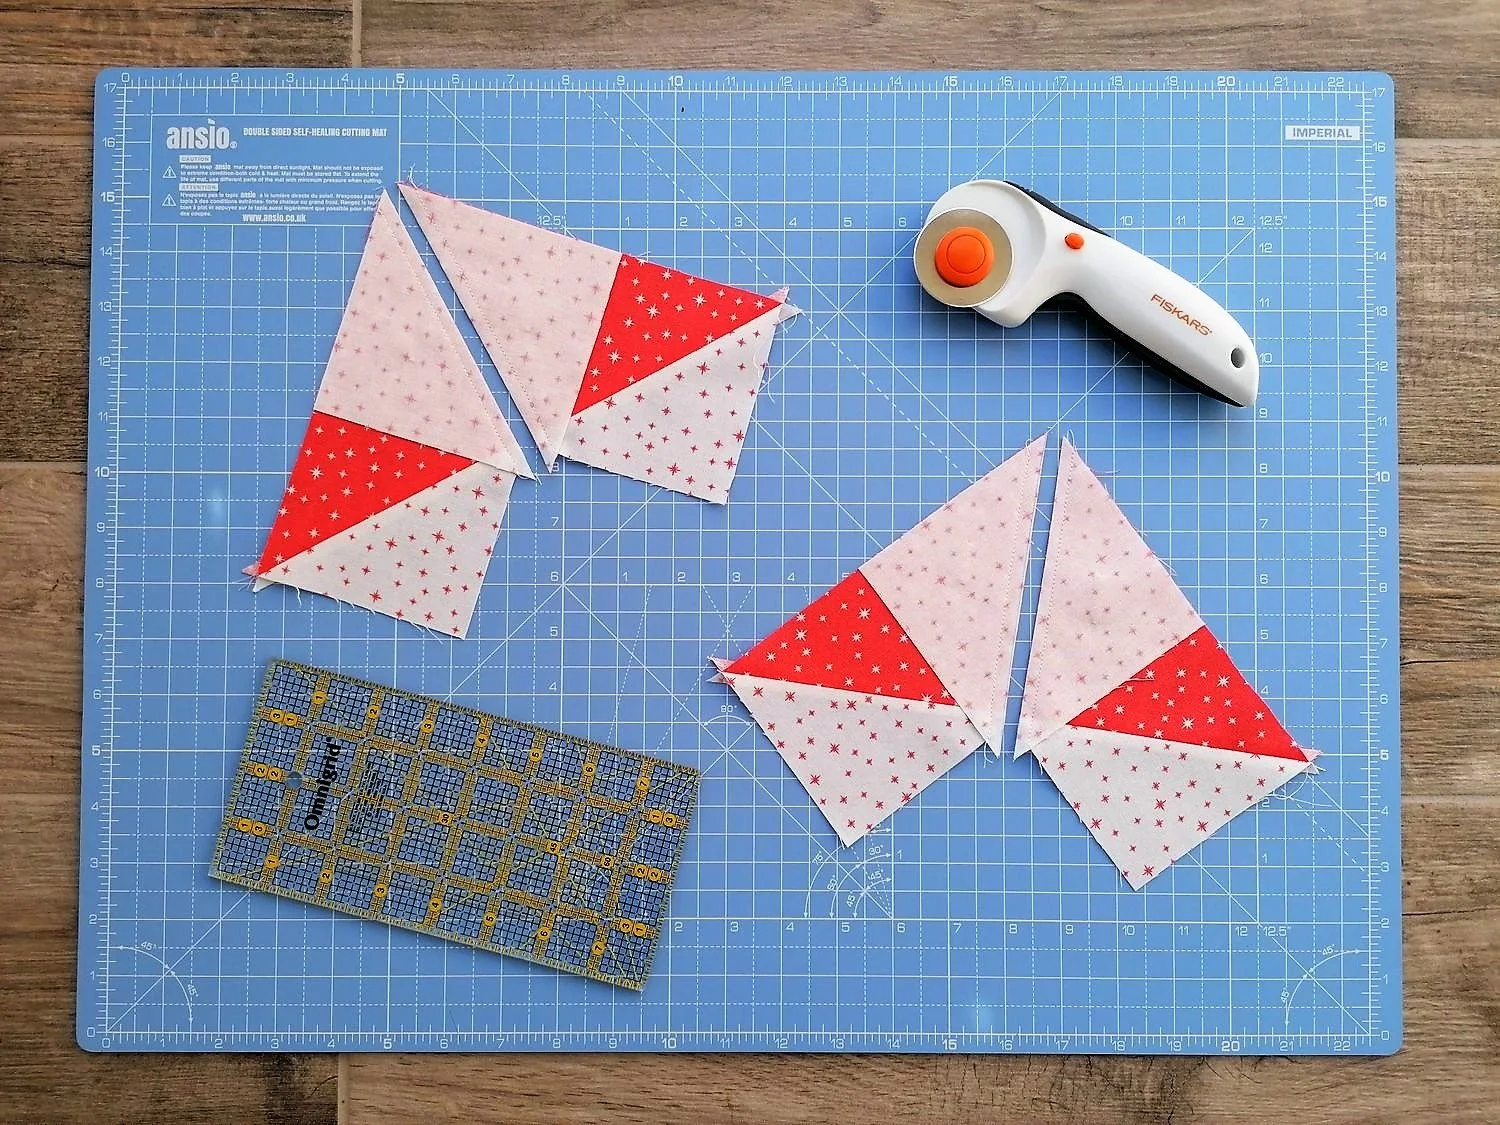
5 Cut along the marked line.
6 Separate into two units.
7 Press the seams open.
Steps 8 - 11
Here’s where the magic happens!


8 Place another small square on each of the two units, right sides facing. Pin in place and mark a diagonal line across the squares.
9 Sew on both sides, ¼” from the line.
10 Cut along the marked lines to separate each into two FG units.
11 Press the seams open.
Steps 12 - 15
Now we need to trim each of the four flying geese to be perfectly accurate. Follow the Airspace pattern carefully to check which dimensions to trim to.

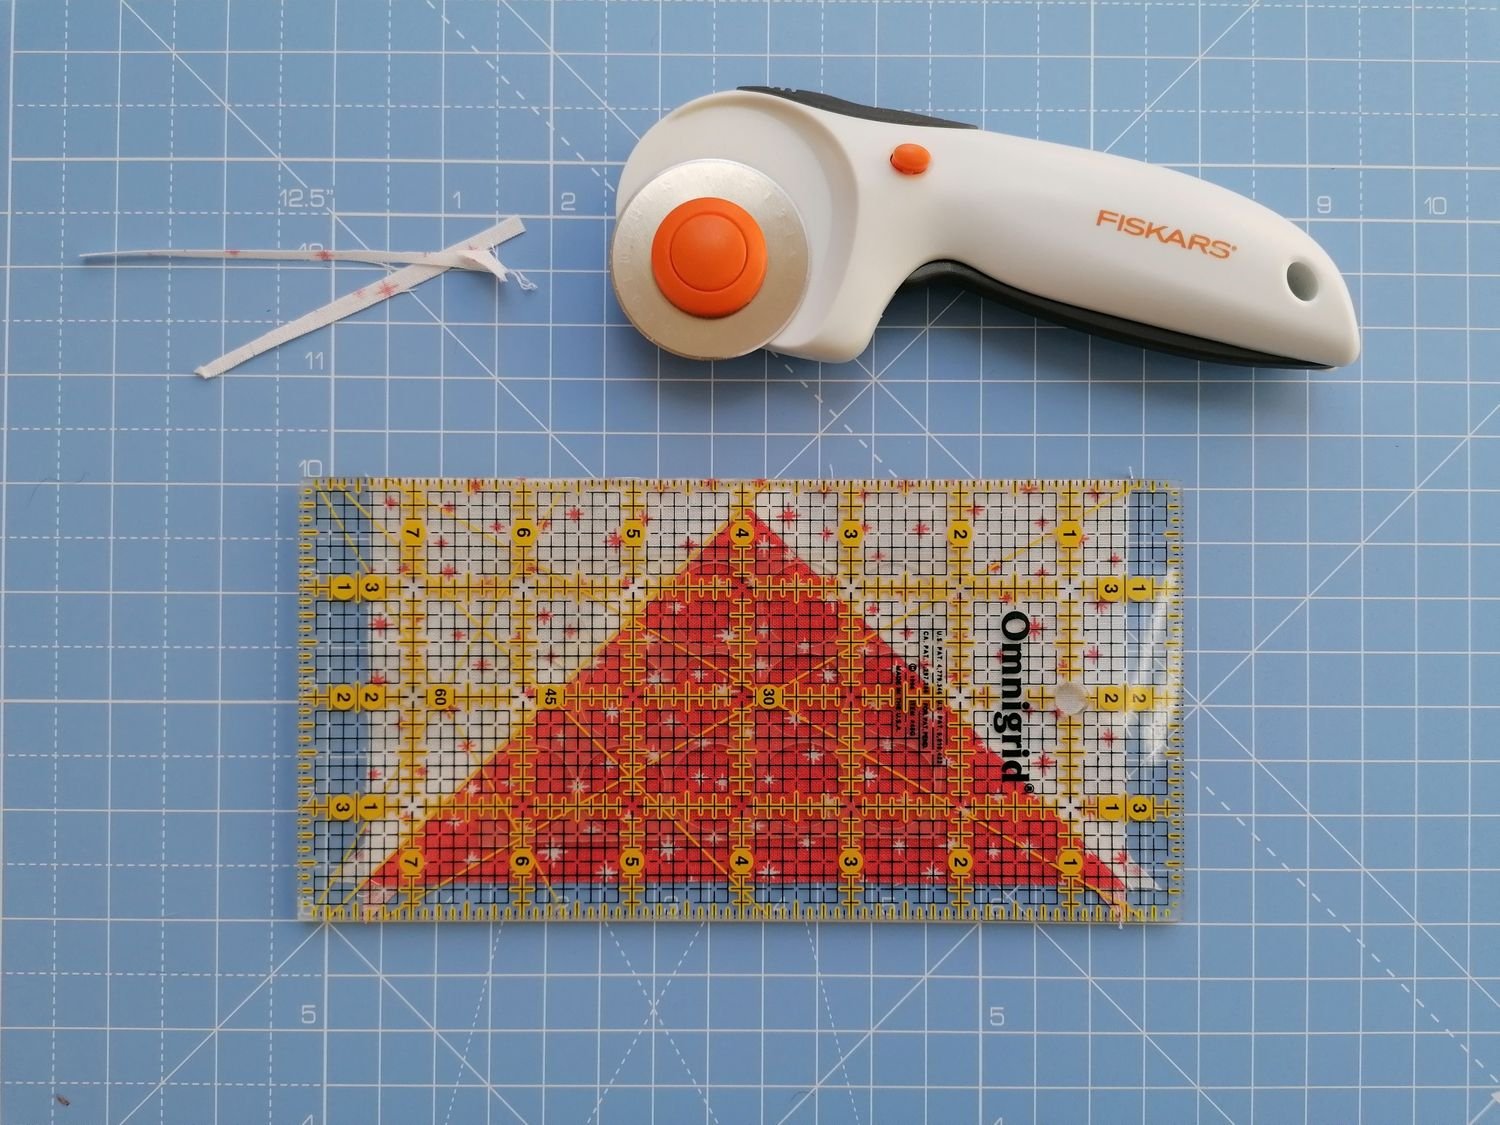
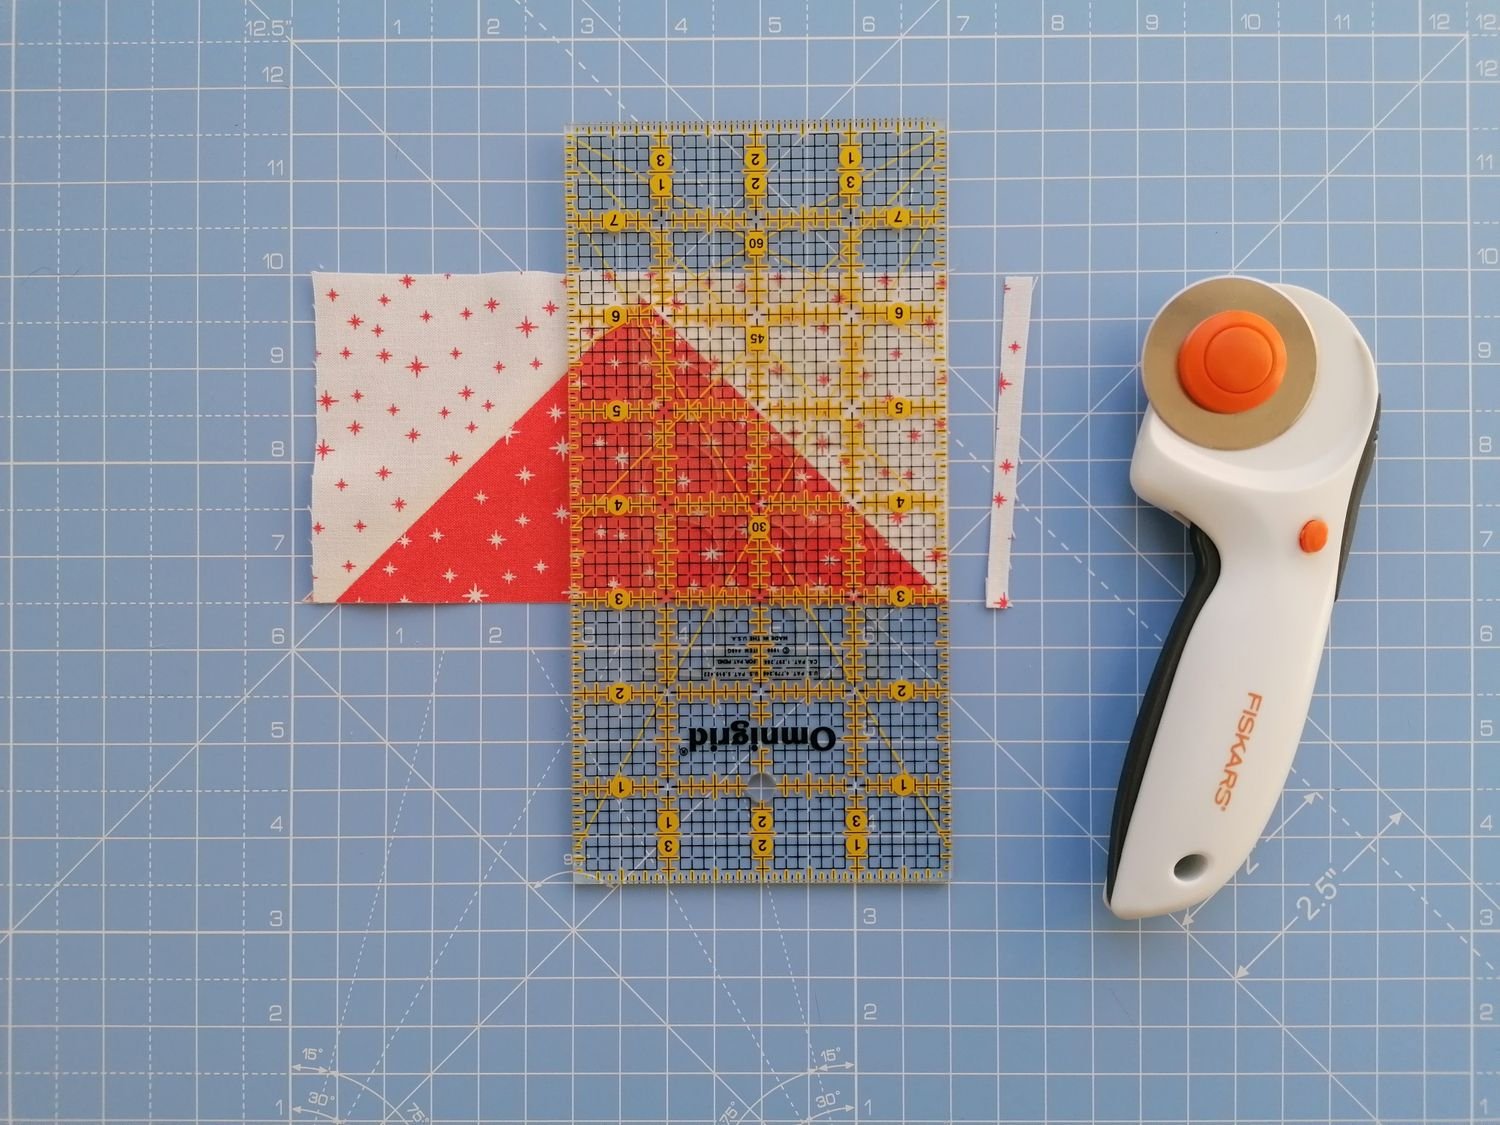
12 Use a 45 degree line on your cutting mat to align with one or both sides of the triangle. Position a quilting ruler to rest ¼” above the tip of the flying geese.
13 Double check the alignment and position of the flying geese and the ruler and then trim the excess from the top edge.
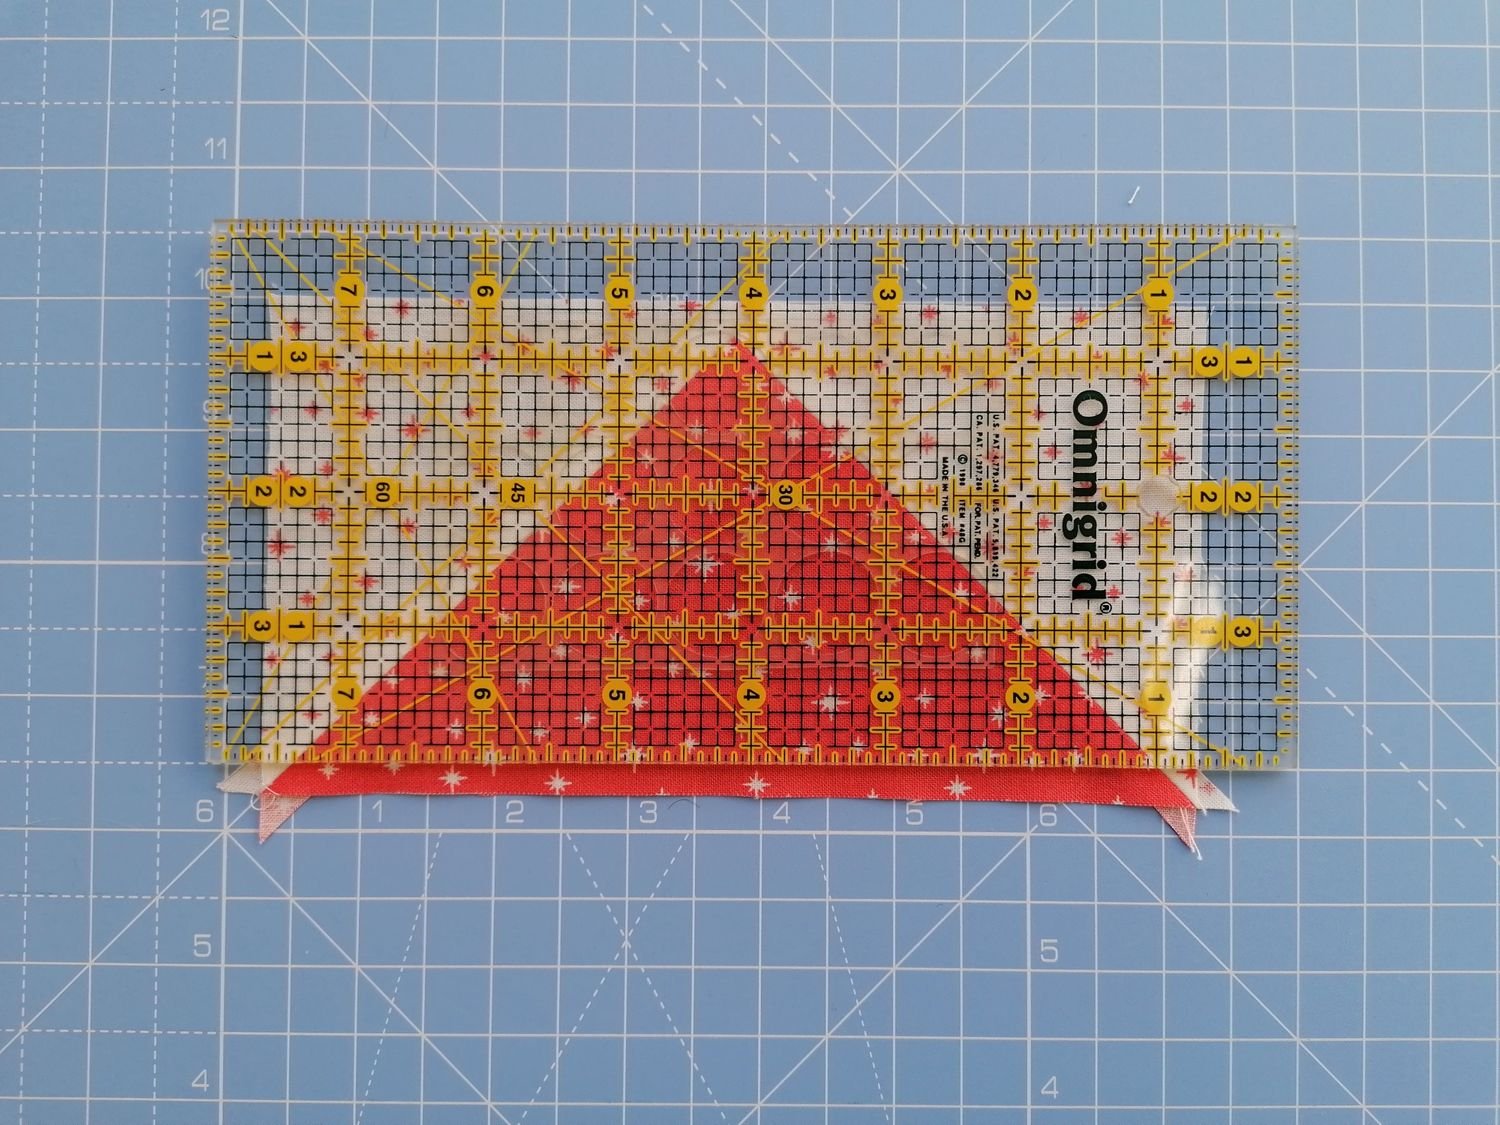
14 Check the dimensions set out in the pattern to measure where to trim off the bottom of the flying geese unit.
15 Remember: measure twice, cut once: double check your measurements and/or the position of your ruler and cutting mat before trimming.
Steps 16 - 20
Now for the last trims to make our flying geese the perfect size.


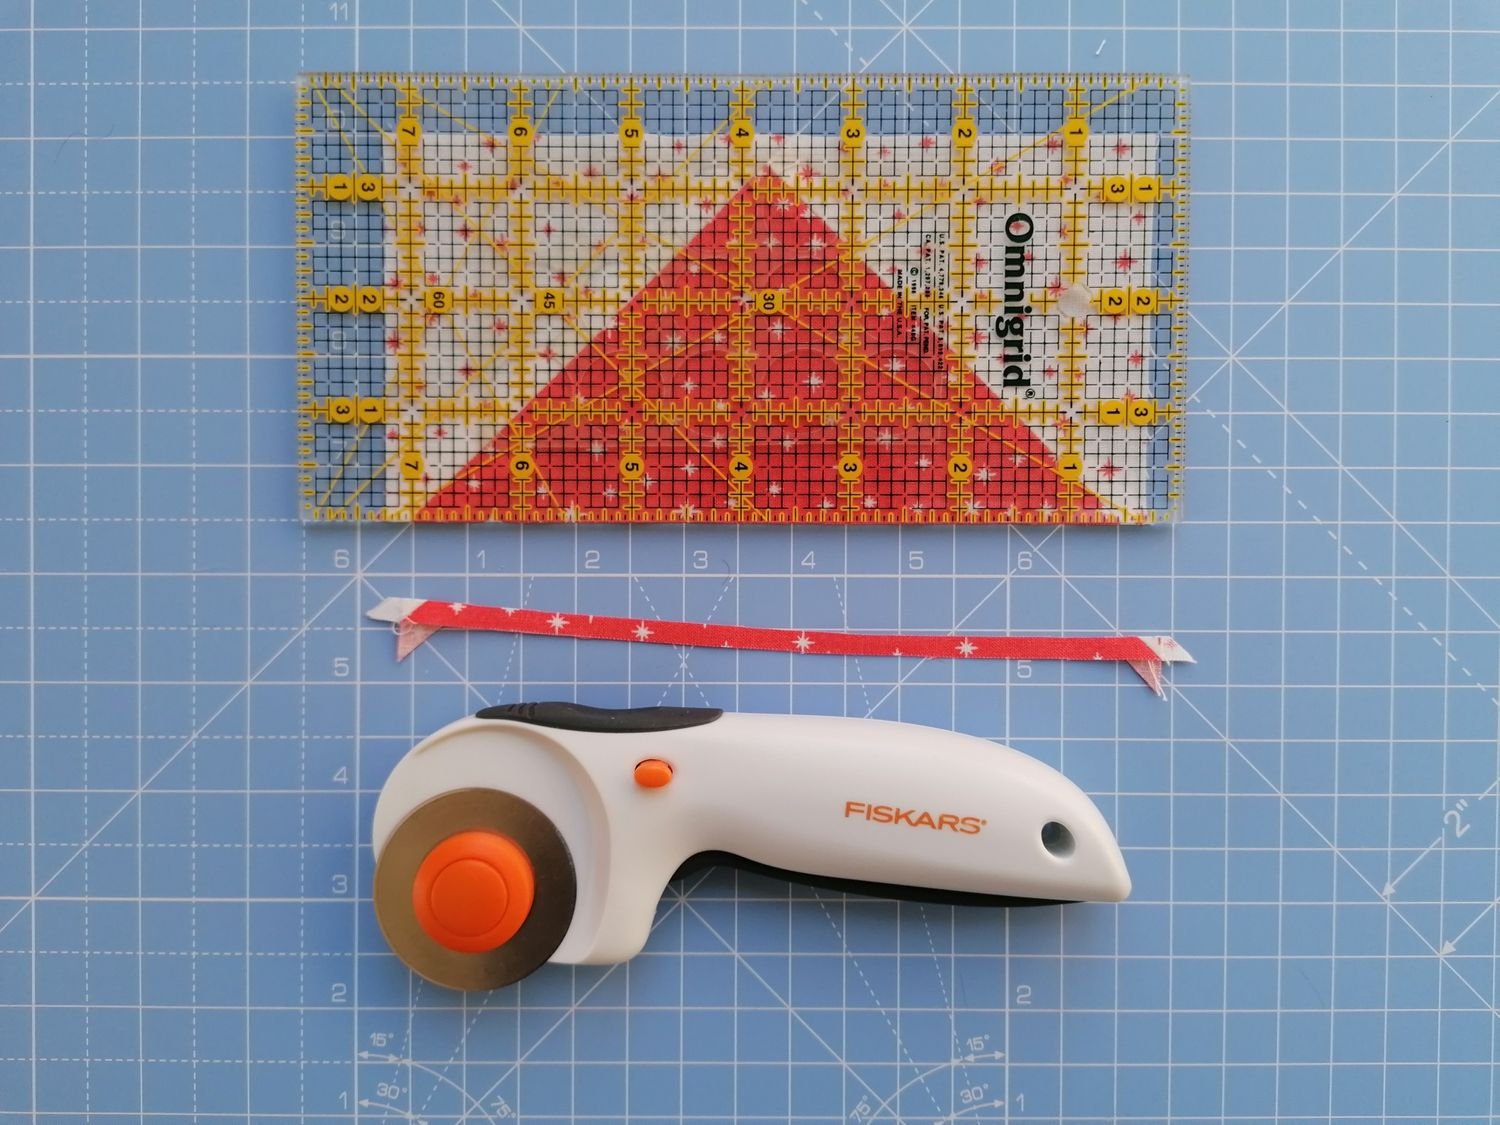
16 Check the width of the finished size of the flying geese in the Airspace Quilt Pattern and calculate the mid-point. Keep the tip of the flying geese at that point while you position the ruler ready to trim one side.
17 Trim the excess.
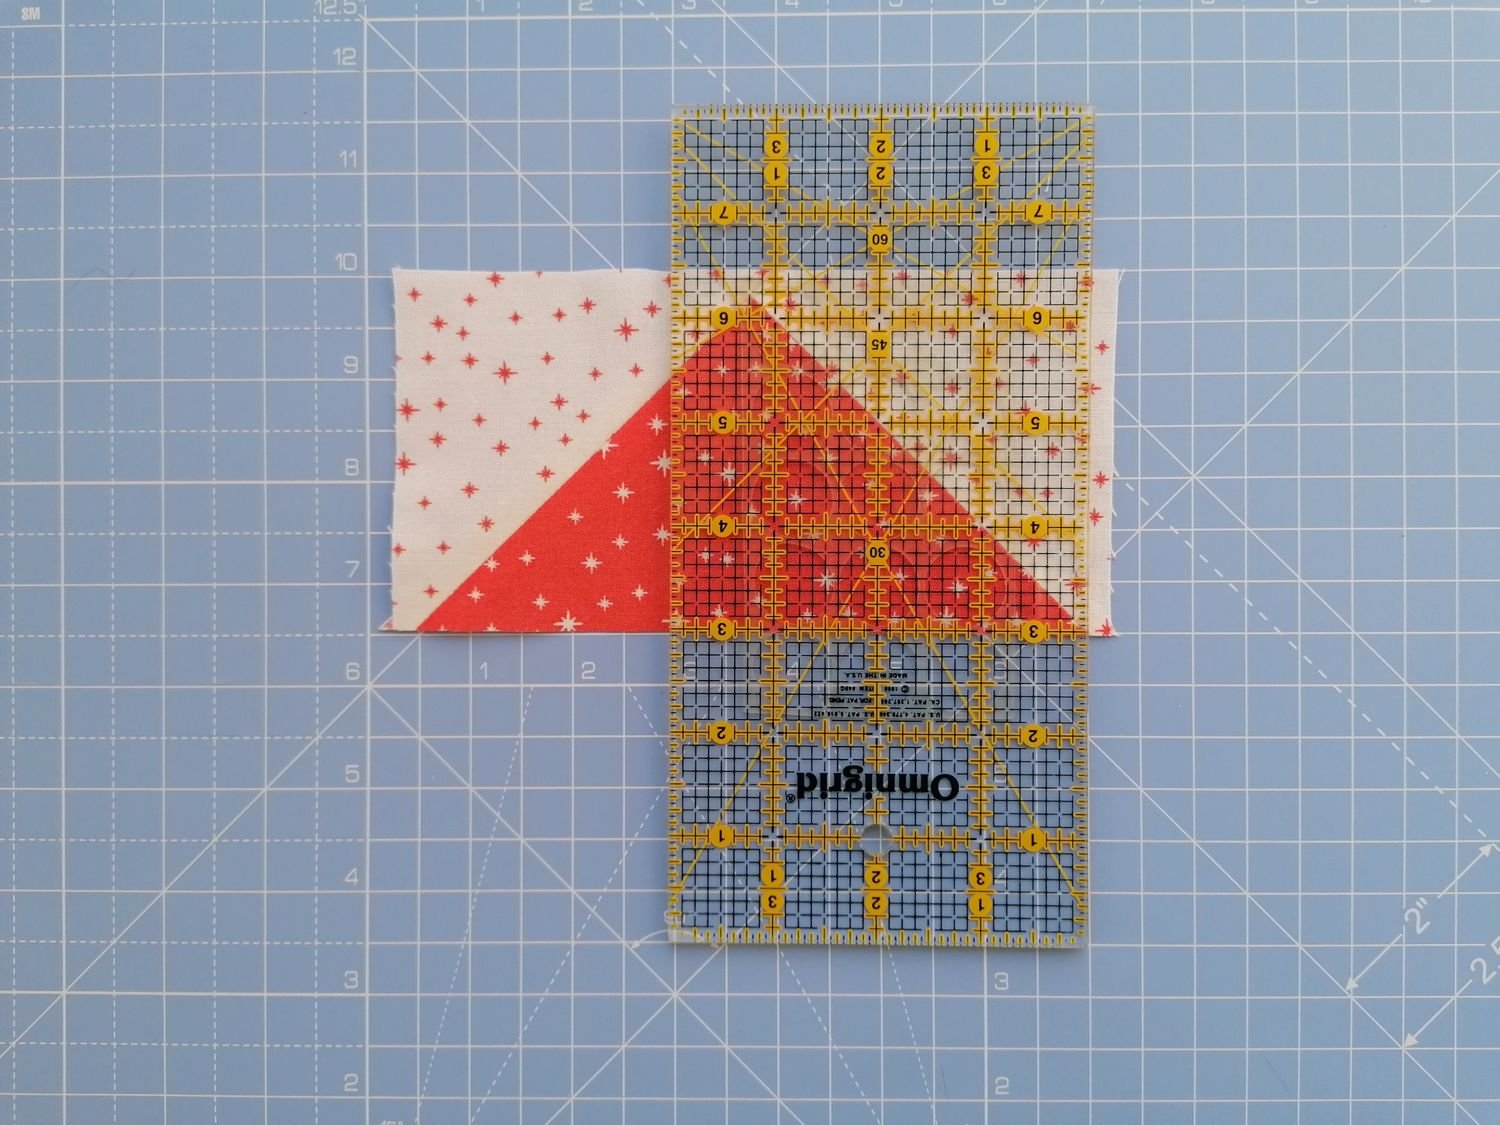
18 Get ready to do the same on the other side.
19 Trim the excess.
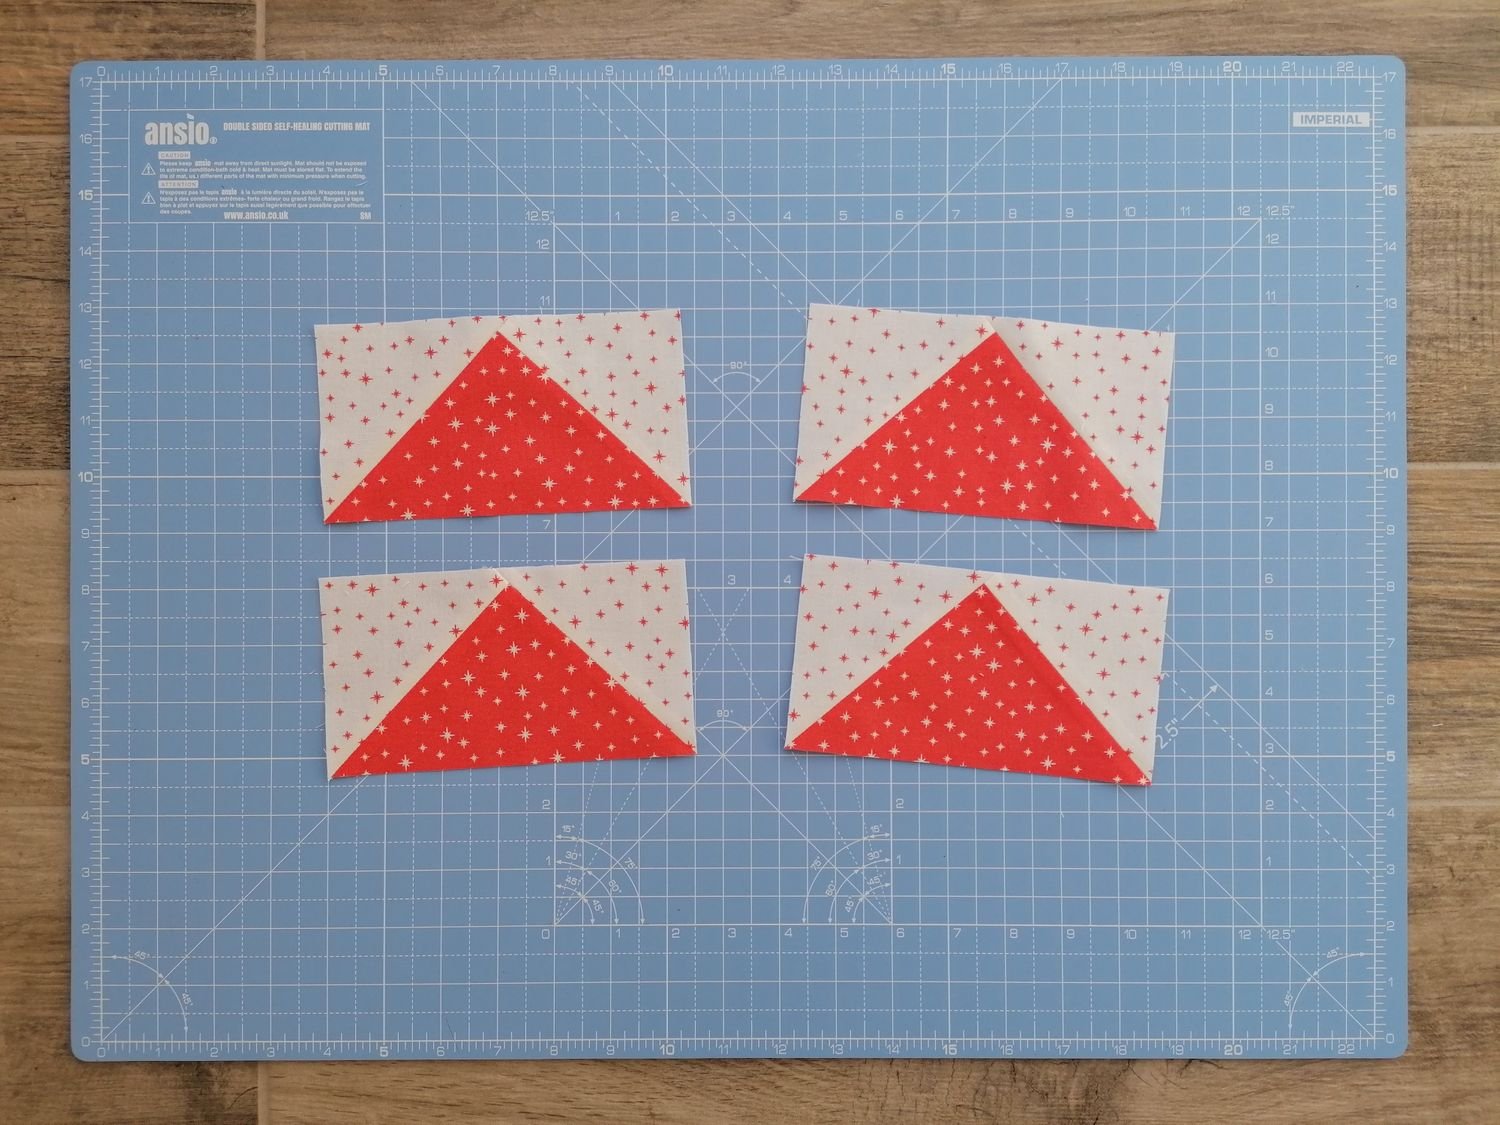
20 Now you have four perfectly trimmed, accurate flying geese ready to make your Airspace Quilt!